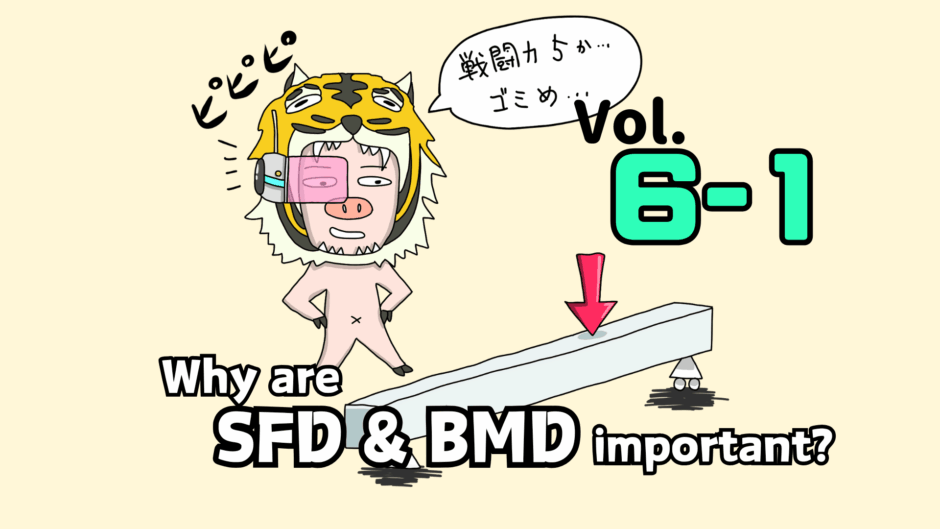

In this article, we’ll walk through the basics of Shear Force Diagrams (SFD) and Bending Moment Diagrams (BMD)—what they mean and why we draw them in the first place.
As you’ll see later, bending is a bit more complicated than tension/compression or torsion for certain reasons. There’s a lot to learn, but nothing really starts until you understand SFD and BMD. They’re that important.
A lot of people get overwhelmed and start to think this topic is difficult… but honestly, it’s not.
If you take the time to really understand what we cover here, you’ll avoid getting stuck right at the beginning of bending problems.
Explore more articles on SFD and BMD here!
How to Draw SFD & BMD: Worked Example and Step-by-Step Solution
How Different Loads Appear in Shear Force and Bending Moment Diagrams (SFD and BMD)
How to Draw Shear Force and Bending Moment Diagrams (SFD & BMD) Step by Step
Shear Force Diagram & Bending Moment Diagram (SFD/BMD): What They Are and Why They Matter
- In mechanics of materials, one of the most important things is figuring out where large stresses occur.
- When it comes to bending, the magnitude of stress is determined by the bending moment at that location.
- SFD and BMD are tools that help you visualize how internal forces (shear force and bending moment) change along a member—so you can instantly see what’s going on.
渾身のnoteを書きました!!

「公式は覚えてるのに問題を見たら手が止まる…」
そんなあなたは『解法の型・流れ』を理解できていないのです。材料力学は色々な問題がありますが、実は決まった型に沿って解くことができ、この型こそが材力の基礎であり極意であると言えます。
このnote記事は、本ブログ管理人のぽるこが「材料力学の問題を解く上での型・要点・コツ」を本気でまとめあげました。かなりの大ボリュームかつエッセンスを詰め込んだものですが、1,200円という映画1本分にも満たない価格設定としました。
本ブログに書ききれていない内容も多く含んでおりますので、ぜひ読んでみてください!
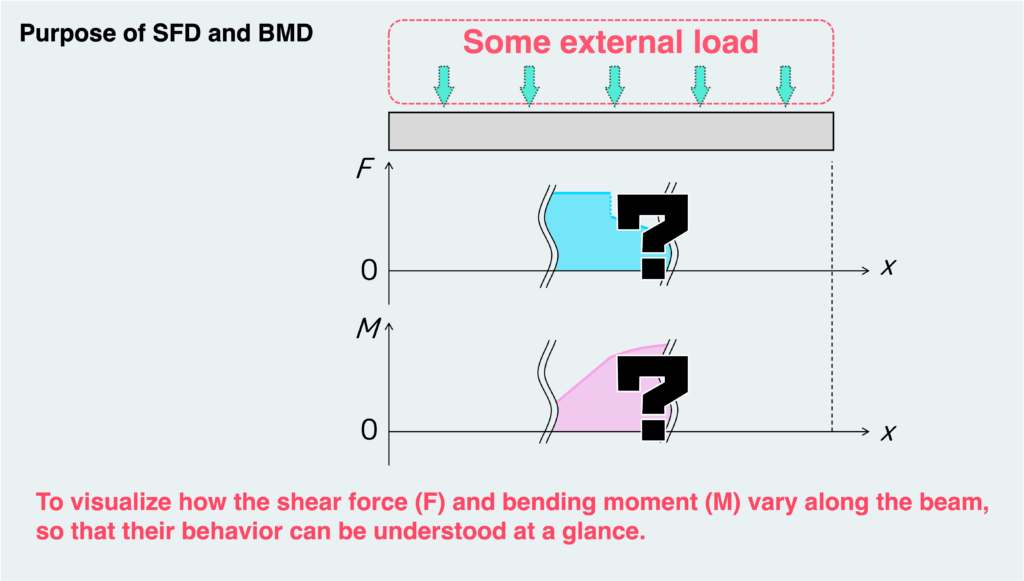
So, what exactly are SFD and BMD for?
SFD stands for Shear Force Diagram, and BMD stands for Bending Moment Diagram.
As the names suggest, they are simply graphs that show how shear force and bending moment vary along a member. The biggest advantage of putting these quantities on a graph is that you can instantly grasp how internal forces flow through the member—just by looking at it.
So, to jump straight to the key point:
Now, you might be wondering:
Why is it so useful to see these changes so clearly?
To answer that, let’s step back for a moment and ask a bigger question:
What is mechanics of materials actually for?
At its core (at least from an engineering perspective), Strength of Materials is about making sure things don’t break.
So where do things fail?
They fail at weak points (that is, locations where the material itself is relatively weak) or at locations where large loads (in other words, high stress) are applied.
In reality, both factors matter. But for now, let’s simplify things and assume we’re dealing with a uniform material. In that case, the most important task becomes identifying where large stresses are acting.
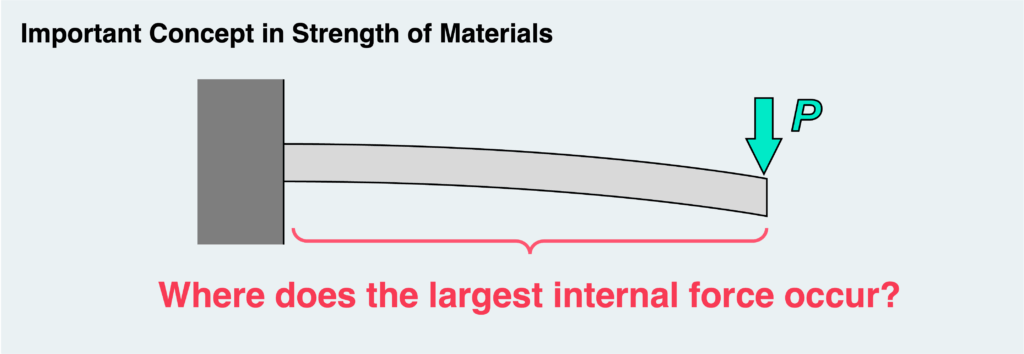
Take a classic example: a cantilever beam.
By thinking about where the largest loads occur (as shown in the figure), we can answer key questions like:
- Where is the most likely failure point?
- Which part of the structure is the most critical?
- How large is the stress at that location?
As explained in other articles, stress is determined by the internal forces acting at a given point.
So, if we want to understand how stress changes within a material—and where it reaches its maximum—we first need to understand how those internal forces vary.
And this is where bending becomes a bit special.
Unlike tension/compression or torsion, bending involves a more complex distribution of internal forces.
In the case of tension and compression, the internal force acting on any cross-section can be understood as shown in the figure below.
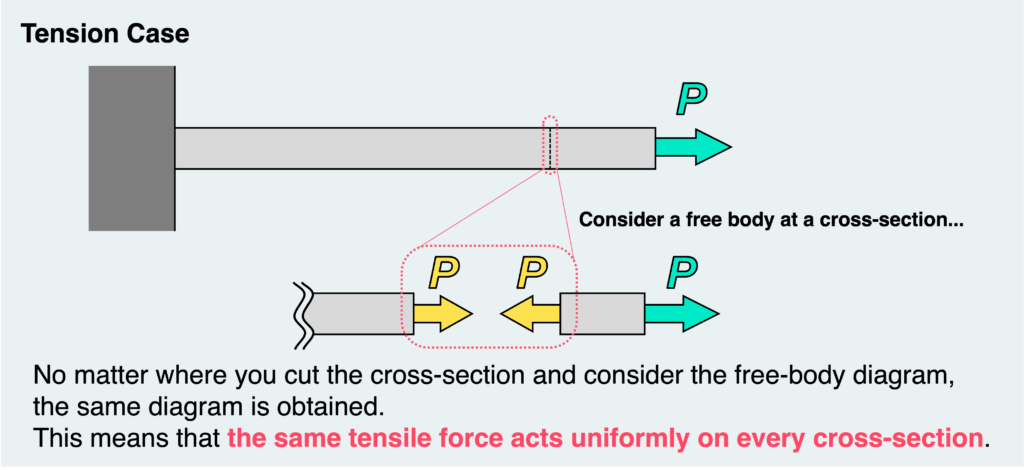
As you can see, the key point is this:
No matter where you look within the material, the internal force (in this case, axial force) is the same at every cross-section.
In other words, for tension and compression, there’s really no “variation” of internal force to worry about. Wherever you look, the internal force is equal to the applied external load.
Since the stress in the material is determined by this internal force, a constant internal force means that the stress is also uniform throughout the material.
The same idea applies to torsion.
In torsion, the internal force takes the form of torque, and the resulting stress is shear stress. However, just like in tension and compression, the internal force itself does not vary along the member.
So, what’s different when it comes to bending?
Simply put, the internal force can vary depending on the location.
Take a look at the figure below.
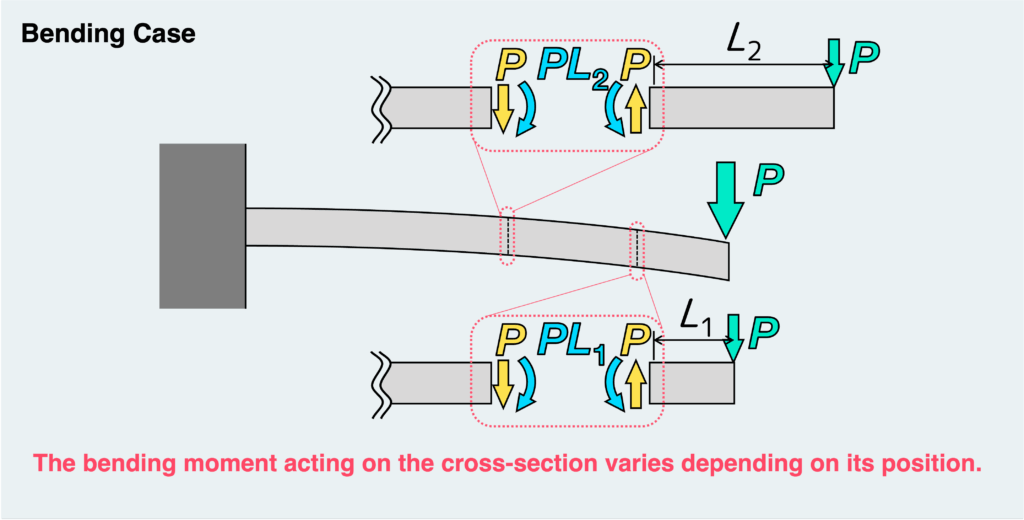
You can see that the bending moment varies along the length of the beam, depending on the position of the cross-section.
When a beam is subjected to bending like this, the stress generated in the material (called bending stress) is determined by the bending moment at each location—and that bending moment is not constant, but changes along the beam.
As you can see from the figure, when a load is applied at the free end, the bending moment becomes larger as you move away from the tip and closer to the fixed end.
In other words, for a cantilever beam, the maximum bending moment occurs at the fixed end, and therefore the maximum bending stress also occurs there.
So, for this kind of structure, the most critical location is the fixed end, and the design must account for the stress generated there.
(If you think about everyday objects, this probably feels intuitive—structures like this tend to break at the base, right?)
As we’ve seen, in bending, the internal force that determines stress (that is, the bending moment) can vary along the beam—although in some cases, depending on the loading conditions, it may remain constant.
Because of this, unlike in tension/compression or torsion, it becomes important to track how internal forces change along the beam. That’s where SFD and BMD come in.
If you can draw SFD and BMD based on the given loads and support conditions, you’ll be able to clearly see:
- how internal forces vary along the beam
- where large internal forces occur
- and which part of the beam is the most critical
In fact, whenever you deal with bending problems, this is always the starting point. That’s why mastering SFD and BMD is so important.
At this point, some of you might be thinking:

“Okay, I get why BMD matters—but do we really need SFD?”
Fair question.
If you’re only interested in bending stress, then yes—knowing the bending moment alone might seem sufficient. However, as we’ll see in later articles, SFD and BMD are closely related and connected through an important relationship, so it’s much more convenient to consider them together.
Also, shear force isn’t just “there for no reason.”
It actually generates shear stress within the cross-section.
In some cases, shear stress can be important. But in typical beam bending problems, the stress caused by bending moments (bending stress) is usually much larger than the shear stress caused by shear forces.
So in most cases, failure is governed by bending stress rather than shear stress.
We’ve gone through the purpose and significance of SFD and BMD in detail—does it make sense now?
In the next article, we’ll dive into how to actually draw them and the key characteristics you absolutely need to understand.
Make sure to check out the next article as well!
Explore more articles on SFD and BMD here!
How to Draw SFD & BMD: Worked Example and Step-by-Step Solution
How Different Loads Appear in Shear Force and Bending Moment Diagrams (SFD and BMD)
How to Draw Shear Force and Bending Moment Diagrams (SFD & BMD) Step by Step
Shear Force Diagram & Bending Moment Diagram (SFD/BMD): What They Are and Why They Matter
- In mechanics of materials, one of the most important things is figuring out where large stresses occur.
- When it comes to bending, the magnitude of stress is determined by the bending moment at that location.
- SFD and BMD are tools that help you visualize how internal forces (shear force and bending moment) change along a member—so you can instantly see what’s going on.
渾身のnoteを書きました!!
「公式は覚えてるのに問題を見たら手が止まる…」
そんなあなたは『解法の型・流れ』を理解できていないのです。材料力学は色々な問題がありますが、実は決まった型に沿って解くことができ、この型こそが材力の基礎であり極意であると言えます。
このnote記事は、本ブログ管理人のぽるこが「材料力学の問題を解く上での型・要点・コツ」を本気でまとめあげました。かなりの大ボリュームかつエッセンスを詰め込んだものですが、1,200円という映画1本分にも満たない価格設定としました。
本ブログに書ききれていない内容も多く含んでおりますので、ぜひ読んでみてください!